2/26
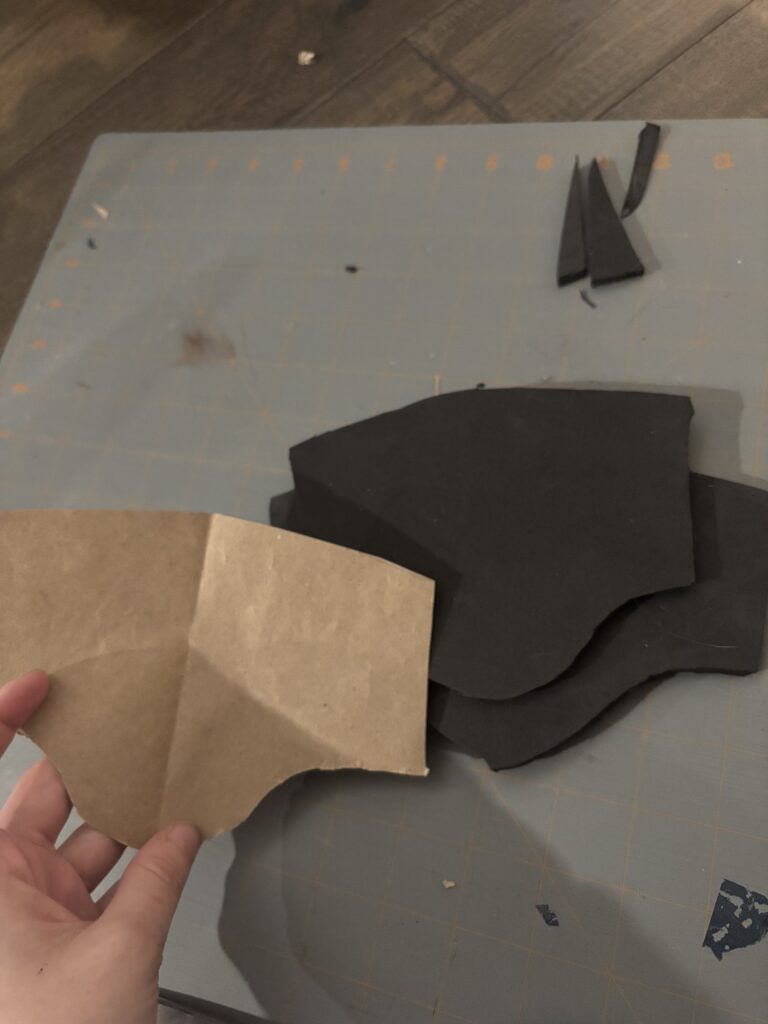
I patterned the armor with brown paper before testing it on a thicker foam than I intend to use for the final product. It took a lot of editing to get the curve to look right on my arm when taking into account the thickness of the foam
3/10
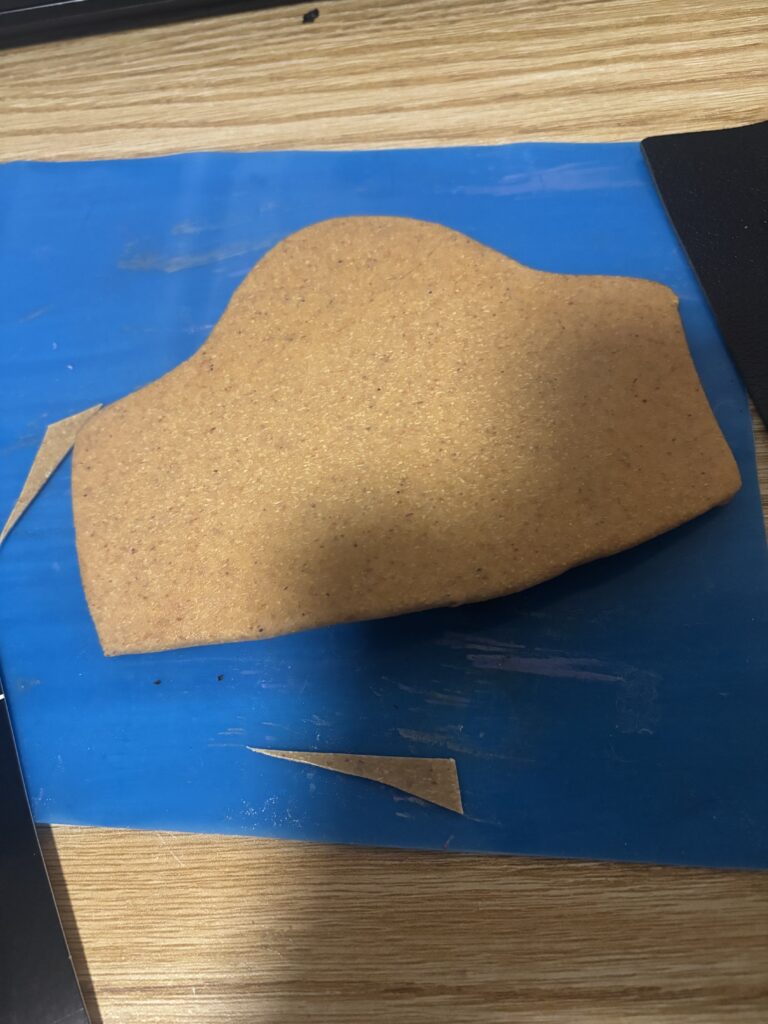
I cut the base out of a thinner foam to help reduce thickness but still allow for structure, and then covered it in Worbla to stiffen the foam. In the future I think I’d use the sign plastic to make it even thinner.
3/11
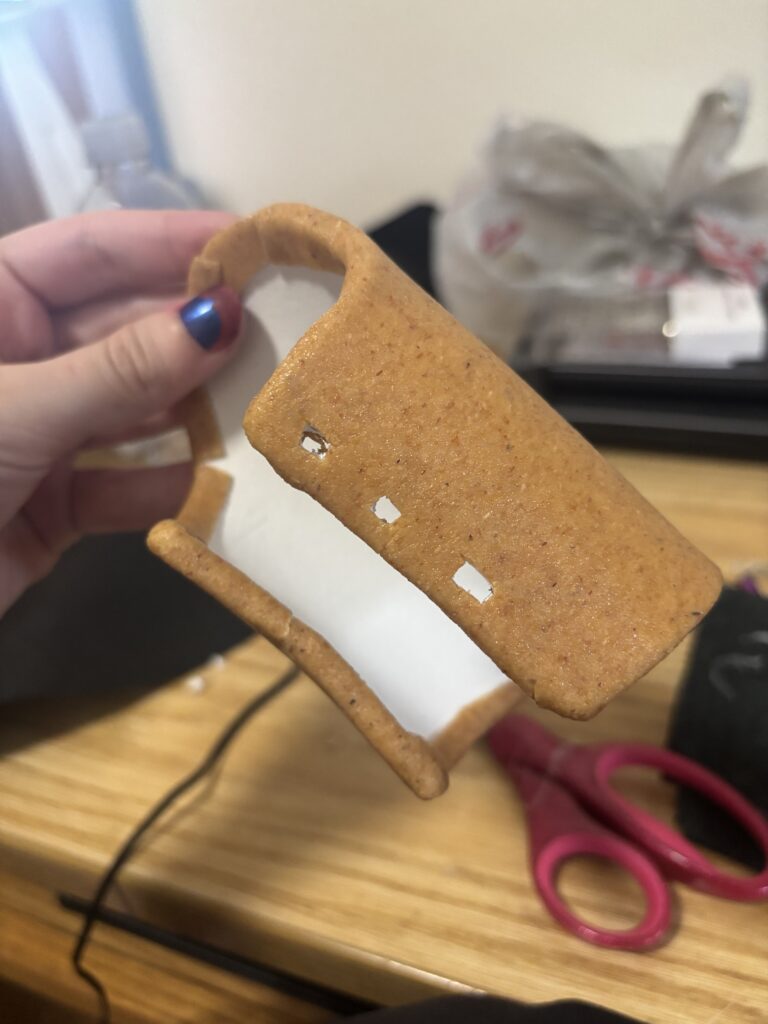
I shaped the cuffs to my arm, the cuffs are not perfectly circular, and in fact look a little wonky off my arm, this is for actor comfort. If it was not uneven looking it would rub up against a bone which would cause irritation or injury. On my wrist it fits very snug. I then added the holes to the worbla and foam once it cooled to make room for the lacing. I then attached the leather (not pictured) and cut holes through that as well.
3/12
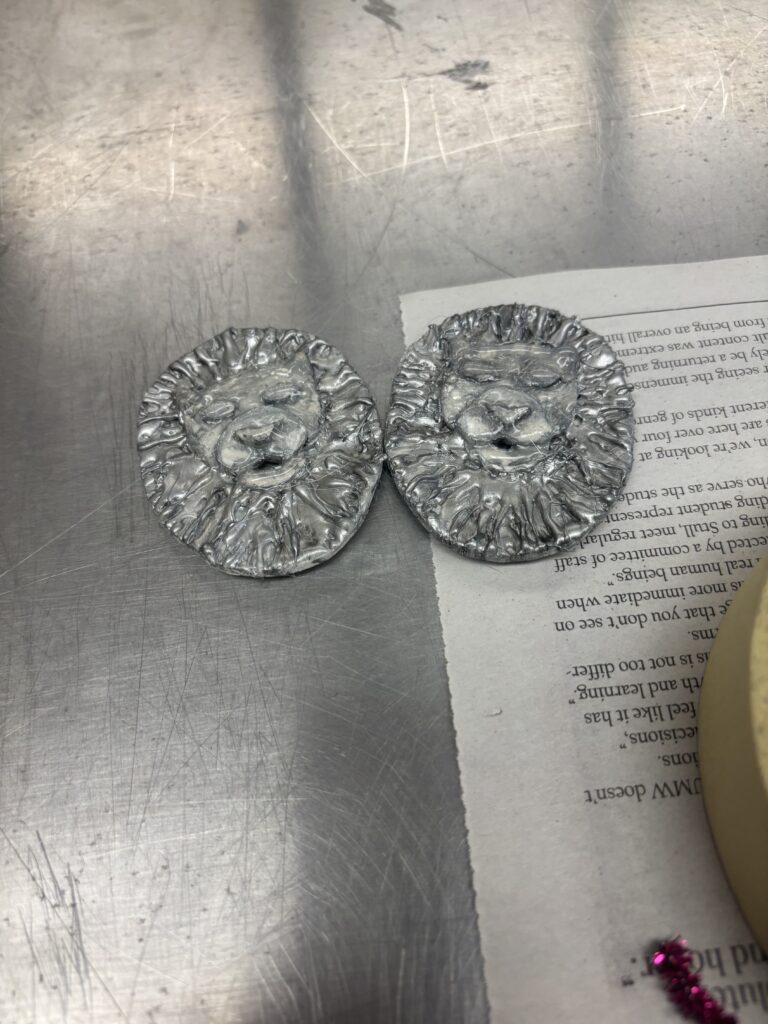
I messed with what to use for the rivets at the bottom, originally I planned to use either silver half rounds or metal pushpins. Instead I went with other pins that had a specific shape that are a better size. I also began to paper mache the silver part ontop using pipe cleaners as a base. I also added hot glue to the lion foam bases I’d made prior.
3/13 – 15
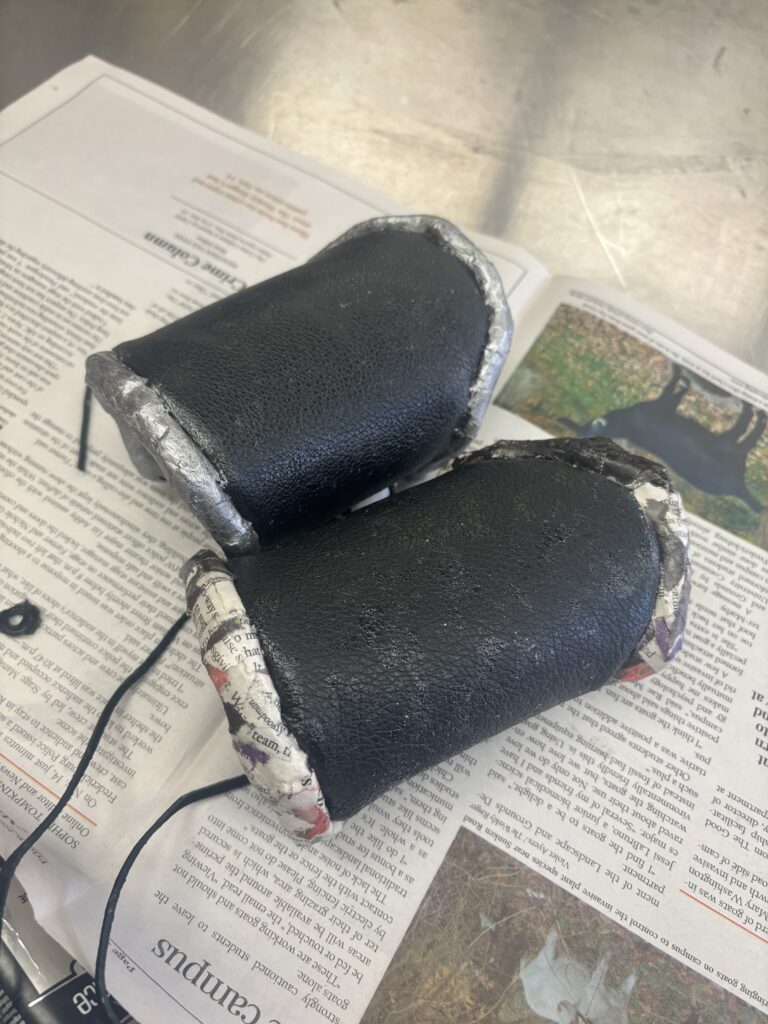
I finished the paper mache on one of the wrist cuffs and painted it black, I began the paper mache on the second wrist cuff. Throughout the process I experimented with different methods on how to paper mache that shape with little structure underneath. I struggled to get it the right size and shape. I also redid the lions using a template for the foam and then hot glue for depth, and painted them black to help add depth underneath the silver paint. I originally planned to have the paper mache cover part of the leather cuff, however while working on it I realized it wouldn’t look right proportionally compared to the design, so I pivoted to keeping it on top.
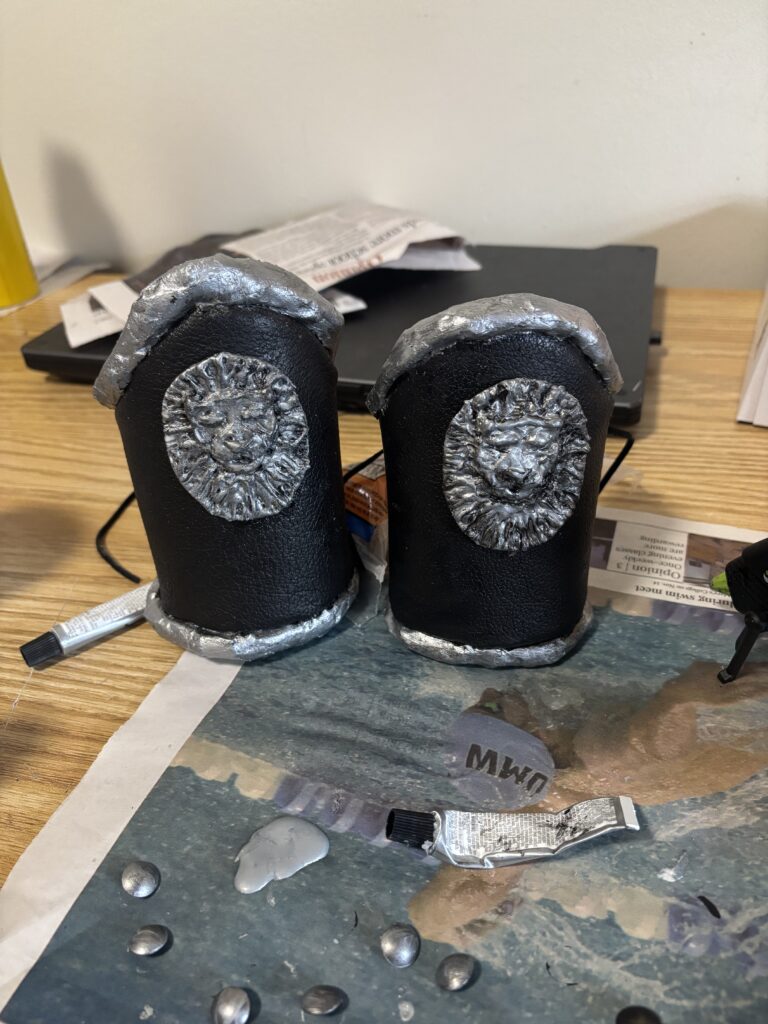
I then finished the paper mache on the other wrist cuff, I really struggled to make this look neat and found myself redoing it a great amount to try and make it look good. I painted the lions and part of the paper mache silver, as well as did mockups of the placement and size for the rivets and lions more.
3/17
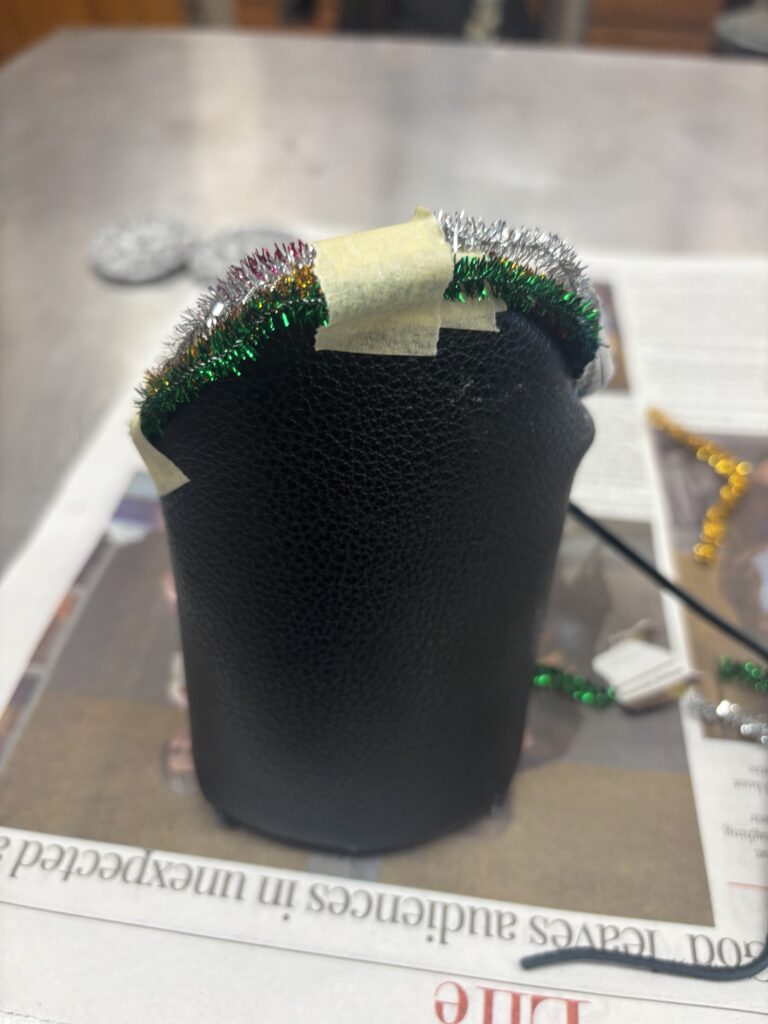
Painted the remaining paper mache black and silver, and added felt to the inside for actor comfort and to not have visible foam. I found myself wishing I’d waited to poke the holes as I found it difficult to recreate the holes in the felt, and thus attached it around them resulting in an unclean look. I noticed glue residue had left a weird shine to the leather, so I painted it over with black acrylic paint to give it all the same texture again. I also cut the sharp bit off the nails I’m using as rivets and began painting the rivets black and silver and gluing on the lions.
3/18
I attached the rivets, I really struggled to get them secure and to sit flat due to not being able to cut the pokey part down far enough, so the earlier ones look really messy but I eventually figured it out to an extent, although I couldn’t rip them off as it was damaging the leather.
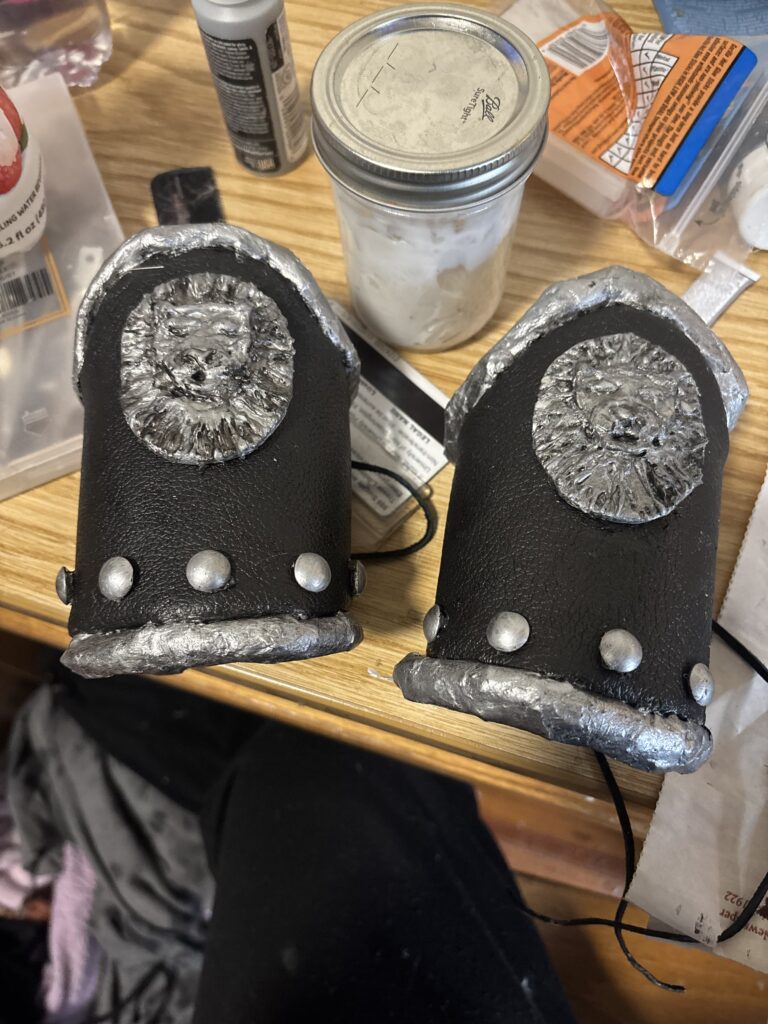
I think I did well in the creation of the base with the wrist cuff. It did end up a little thick, next time I’d use the plastic and potentially a different method to make it look like leather. Next time I would also find a different method to do the silver parts on the sides. While the papermache method had worked in the past I don’t think I have the skill required yet to make it look the way I know it can. I also think the lions still just don’t look right and I had to prioritize emphasis of the lions over having the right rivet size. Overall I made something that stays on a wrist, and doesn’t fall apart even if there is a lot I’d do differently should I do it again.